
Morning Glory Breeding – Self Pollinating
Pollinating blooms is not difficult or hard to understand. This is 3rd or 4th-grade level material so most people will be able to do this. I think what takes real talent is keeping up with your tied pods, harvesting and getting them planted! Self-pollinating is done when you want the seedlings to come out looking true to type. Cross-pollinating is different because you are mixing two compatible flowers with different colors or forms hoping to get a desirable result. See my video for a demonstration on how to check your pods
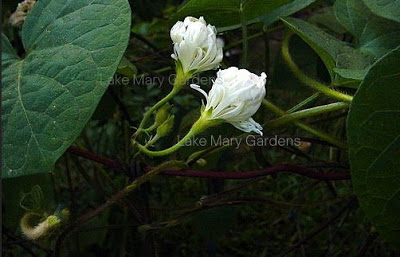
1. Find a flower about to open the next morning.
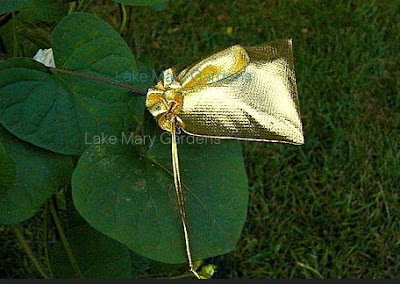
Cover the flower with a breathable yet somewhat water-resistant jewelry bag. Close the bag to keep out insects and protect it from wind carrying pollen to the bloom.
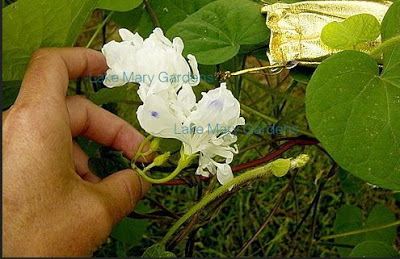
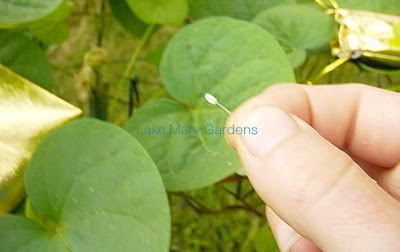
The next morning remove the bag to look for pollen. Pollen is white and powdery. There is a structure in the center of the flower called a stigma that receives the pollen. The idea is to make sure pollen is applied to the top of the stigma. Unfortunately, this flower did not have pollen but I found some pollen on another flower of the same kind that I also had covered the evening before. It is wise to cover several blooms so you can have a better chance to find clean pollen. I pluck the anthers of pollen off and move them to where I need to pollinate the flower. The anthers look like little fluffy white things on tiny stems or filaments. The stigma is suspended on top of a tube right in the middle of the flower called a style that leads to the ovary where the seeds form. If you are selfing the bloom just make sure the flower is pollinated by its own or a from a flower on the same vine. If you are crossing then transfer the pollen to your desired pod parent and tag the bloom with the pod and pollen parent information written on it with permanent ink. I like to make sure I buy a weatherproof permanent marker for the best results.

The pollen is brushed onto the stigma to pollinate the flower. Some people use a little paintbrush or tweezers but I just dust the anther over the pistil and it works fine. Then cover the bloom for the rest of the evening and remove the bag the next evening. Make sure you tie a marker on the bloom so you can come back and pick your hand-tied seeds about a month later after the pod looks brown and papery.

The larger flower morning glories can be tied secure with pieces of yarn and tied back with yarn. Always,always…always tie a piece of yarn at the base of the bloom so you can remember where your specially selected pod is located.
